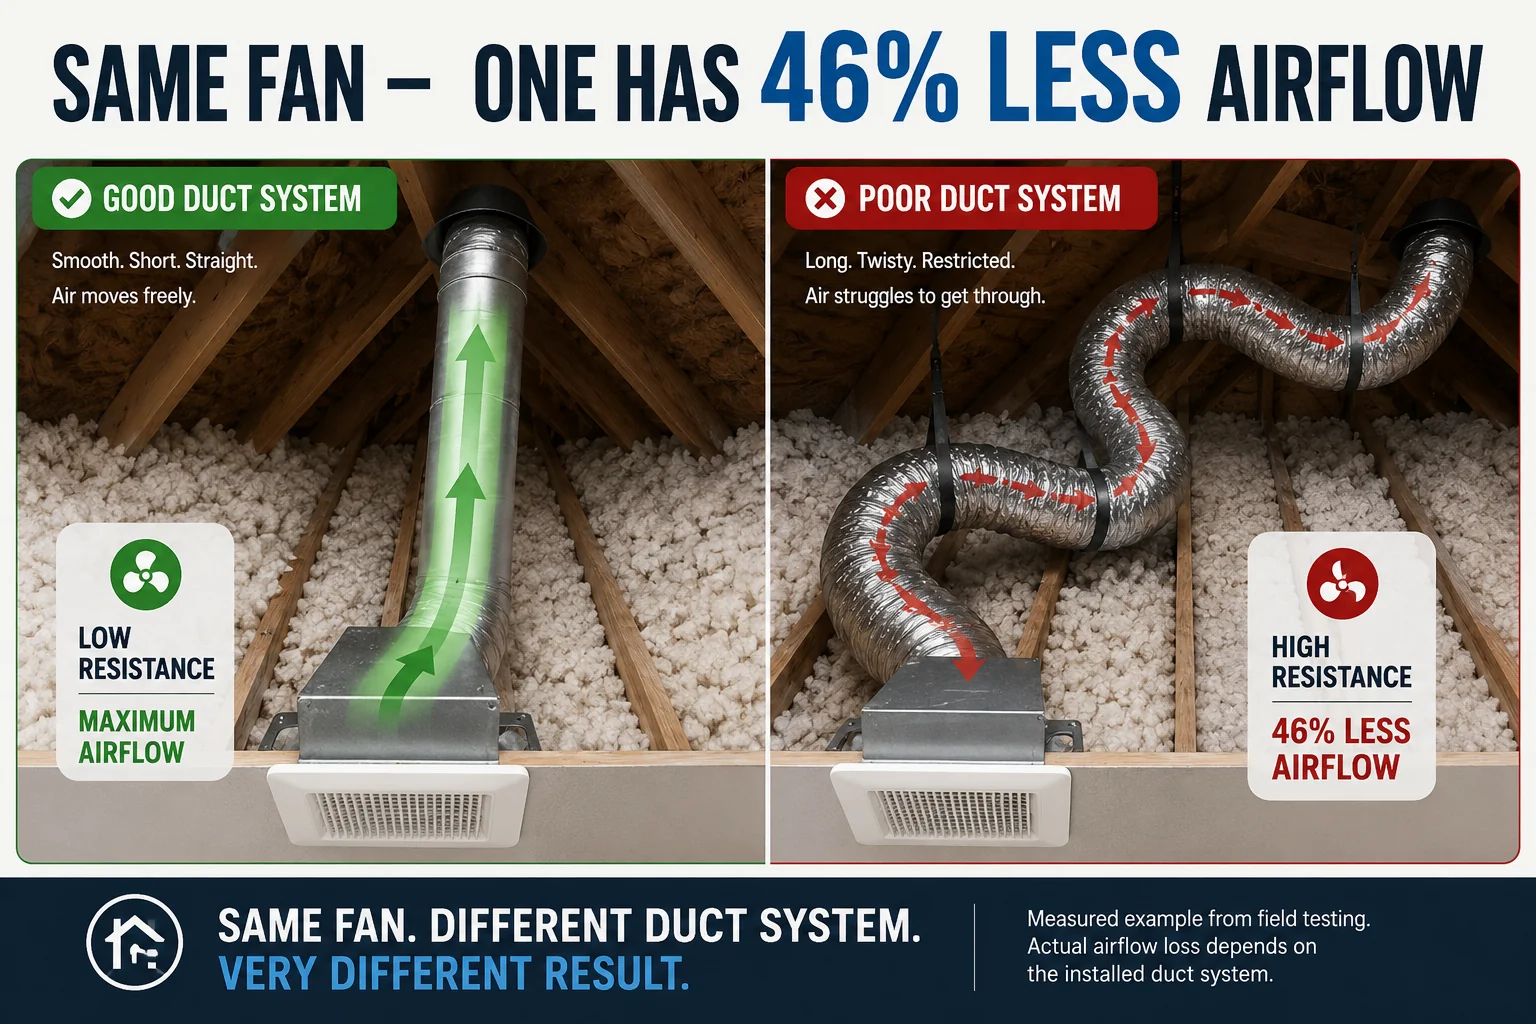

Before You Blame the Bathroom Fan, Look at What It's Connected To
This is especially important when you're replacing an older fan.
Before assuming the fan is the problem, look at the duct size, the route it takes, the length of the run, whether the duct is stretched or bunched up, where it terminates, whether the exterior damper opens, and whether the connections are actually sealed.
Those things can matter just as much as the fan you choose.
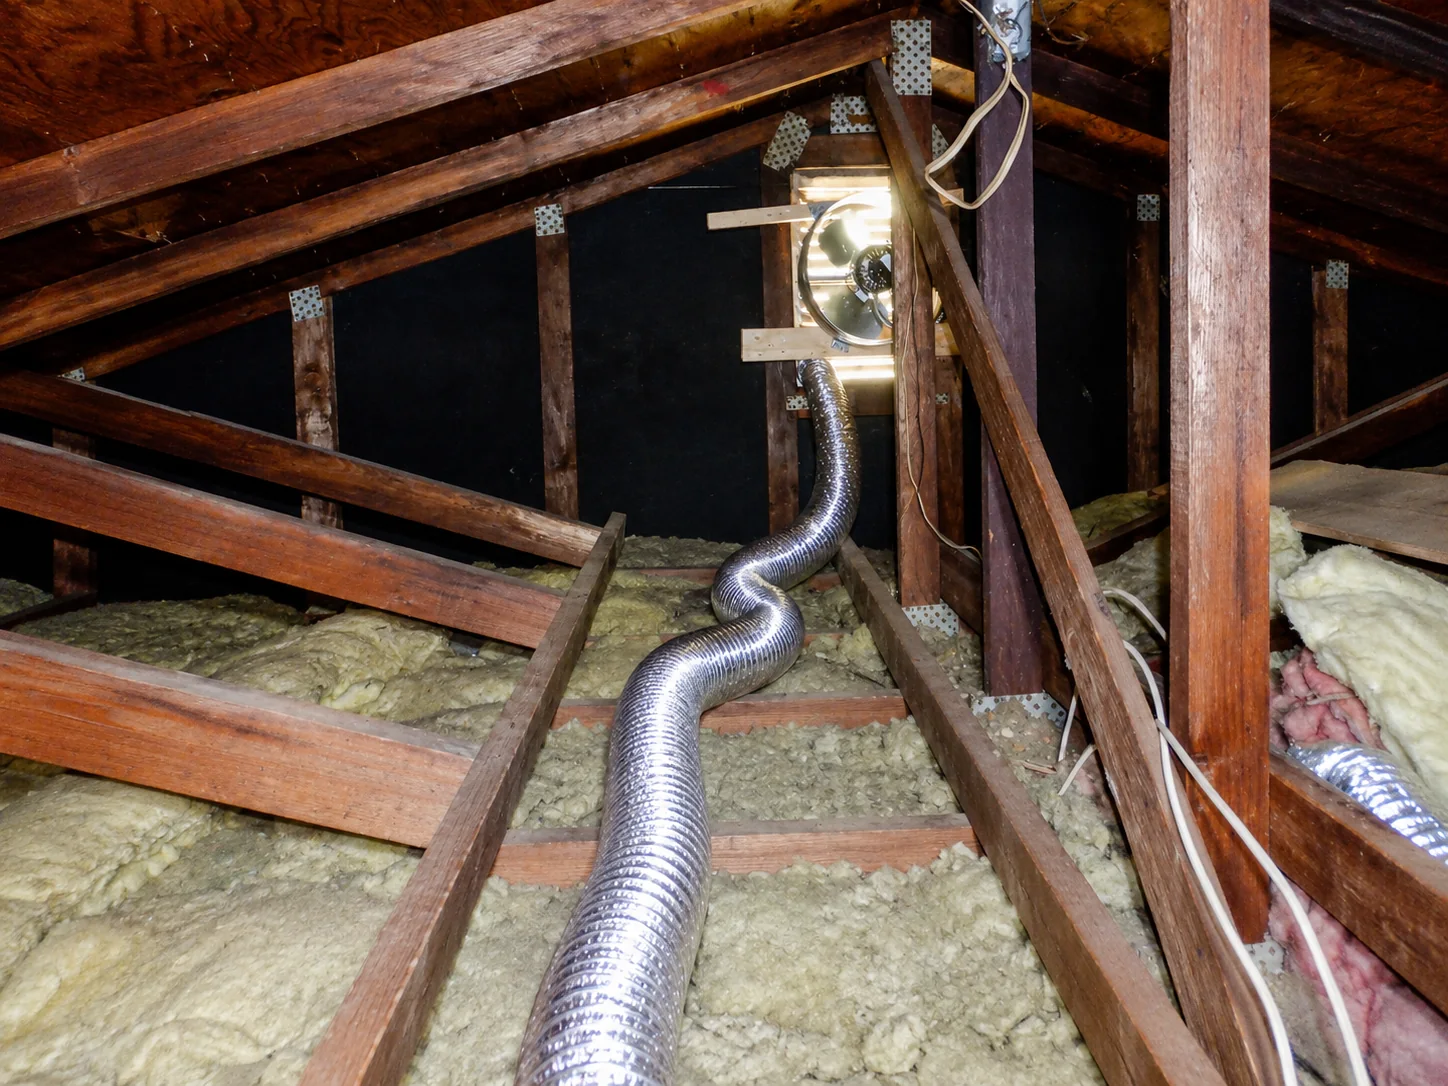
Choosing 110 CFM doesn't guarantee 110 CFM at the grille. Your duct system still matters.
1. Start With the Duct Size
Considering a WhisperFit for an existing small duct? My WhisperFit 3-inch versus 4-inch duct guide explains the supplied adapter question separately from the performance of the full run.
One thing I run into regularly when replacing older bathroom fans is a 3-inch duct connection. A lot of older fans were set up with 3-inch round duct. Most of the newer fans I'm installing use a 4-inch connection.
On one job in Columbia, Maryland, I had an existing fan with a 3-inch connection. Instead of continuing the entire run in 3-inch duct, I created a 3-inch-to-4-inch transition right at the fan.
If the homeowner replaces that fan again down the road, the 4-inch duct system is already there. Nobody has to crawl back into the attic and rebuild the system because the replacement fan uses a 4-inch connection.
My Real Installation
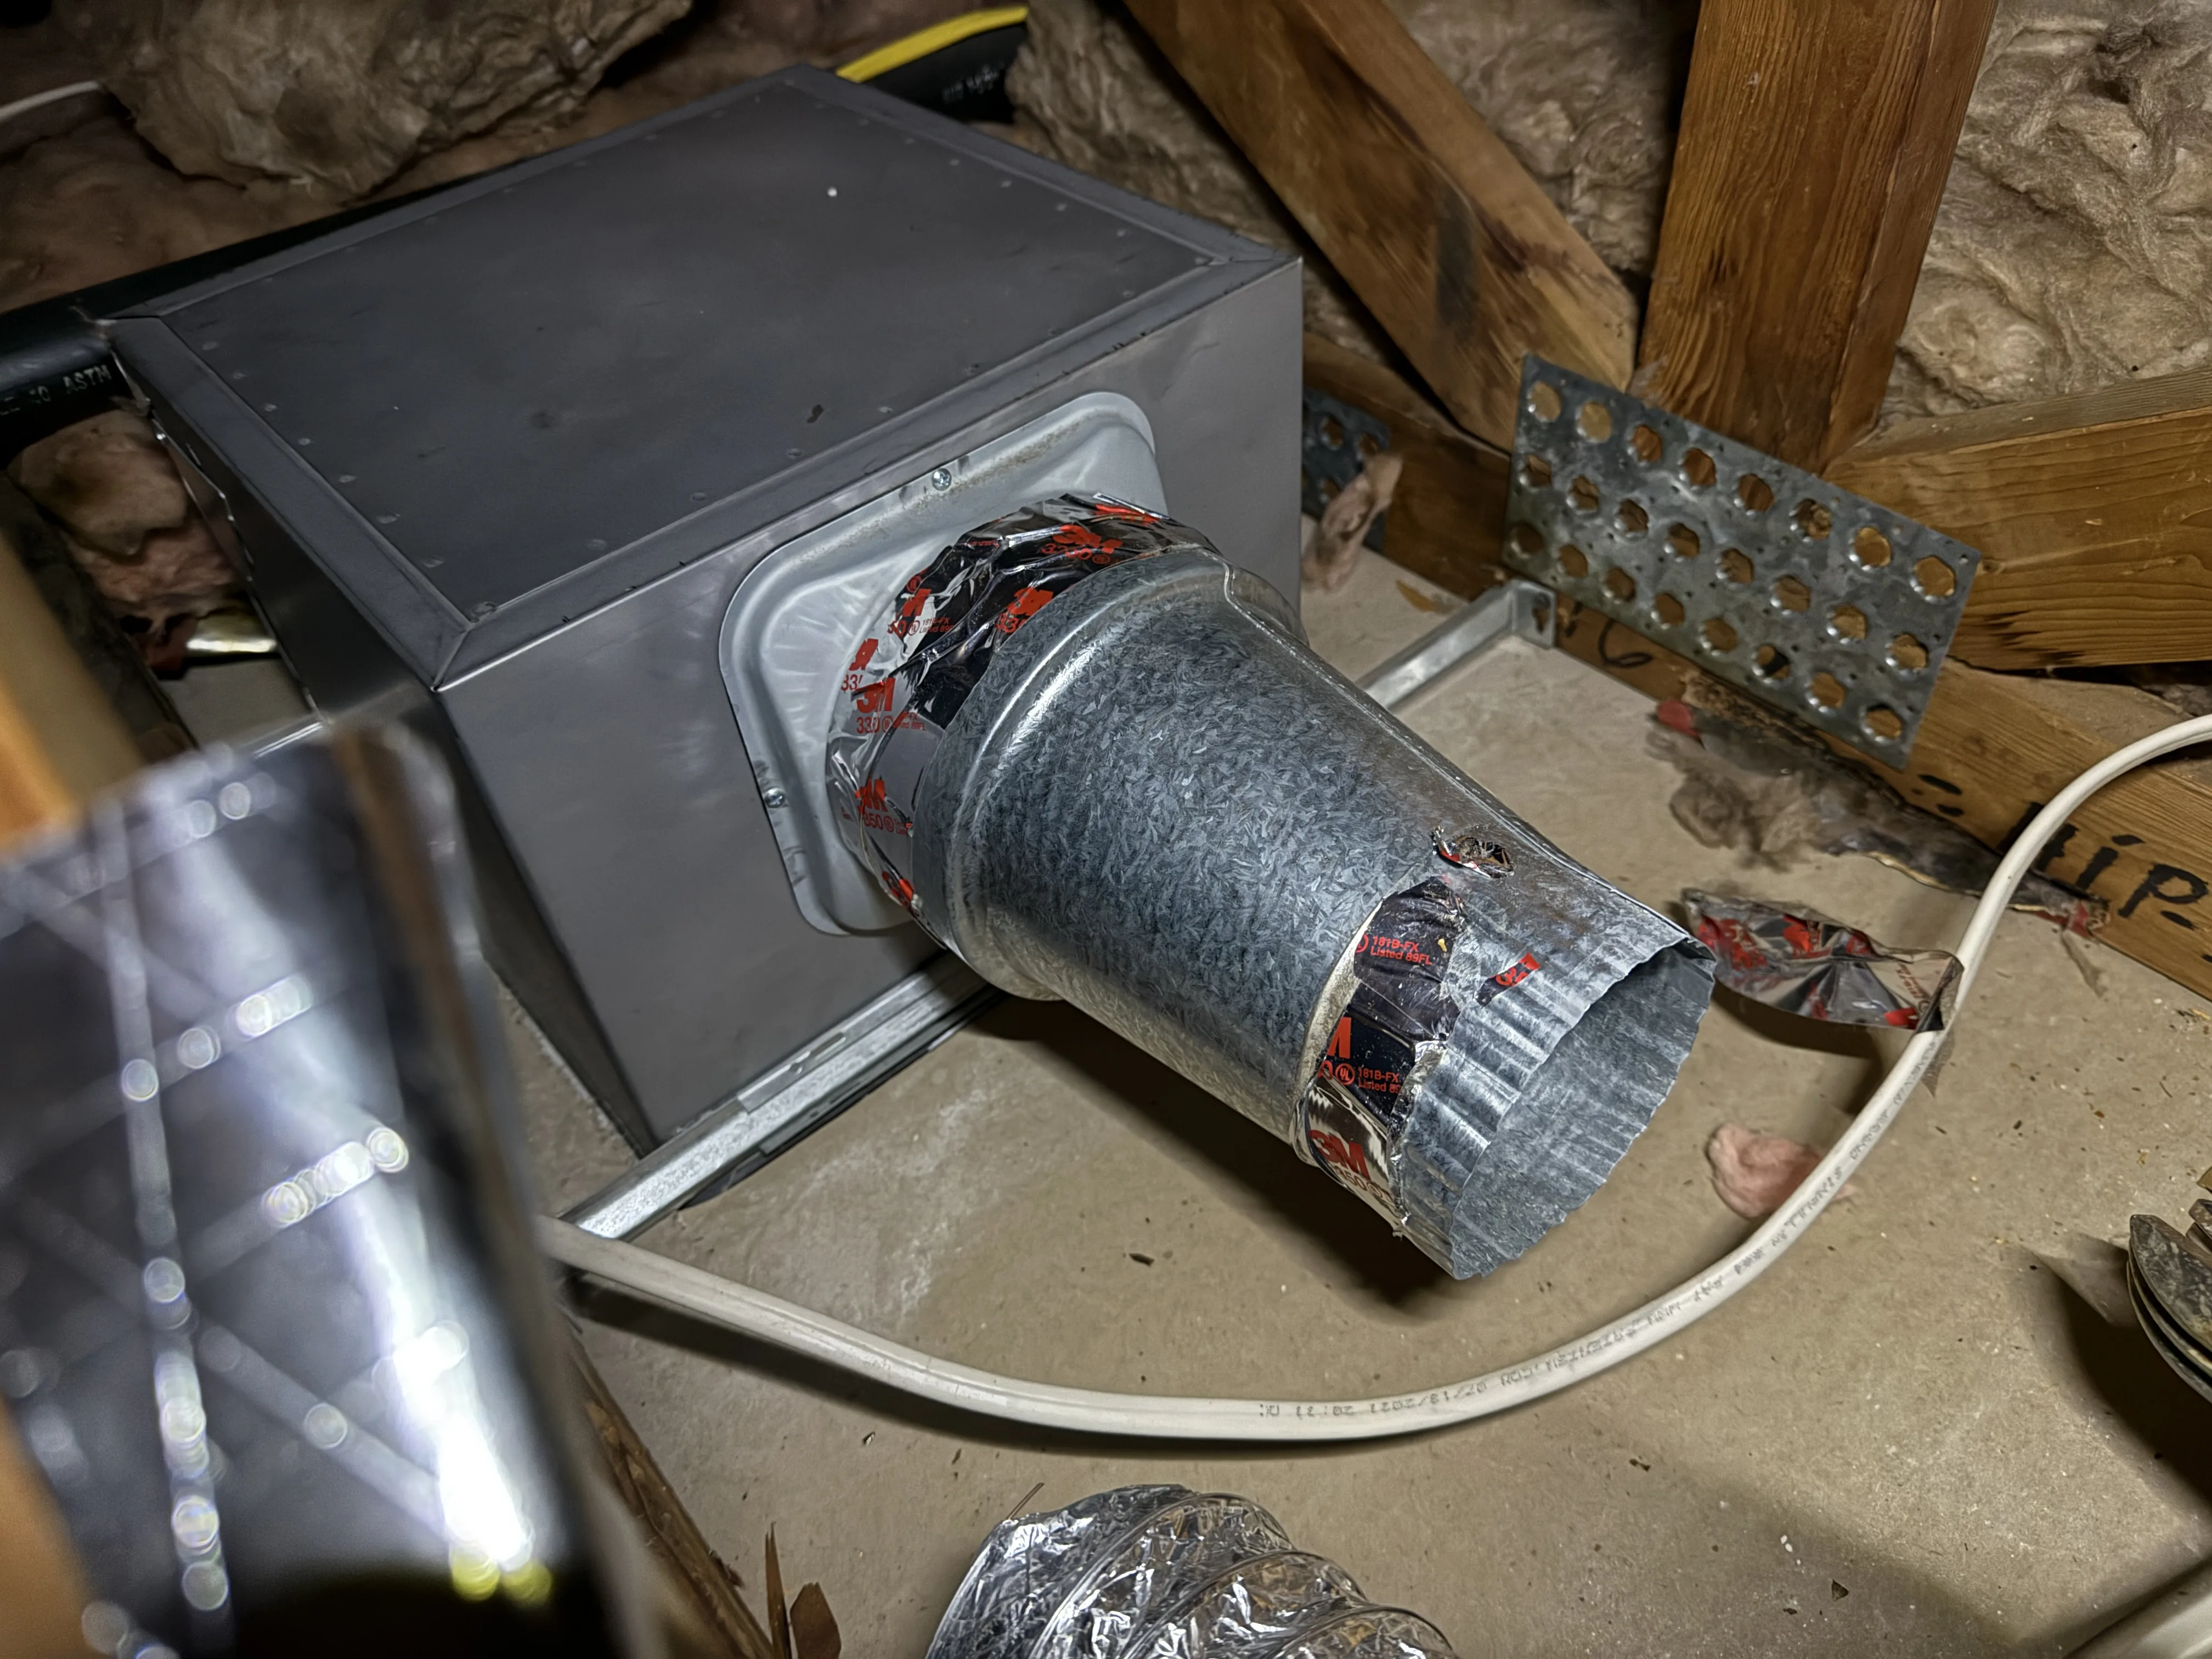
What you're looking at
A 4" modern fan reduced down to 3".
Why it matters
It is making it virtually impossible for it to do the job.
2. Stretch the Flex Duct Out
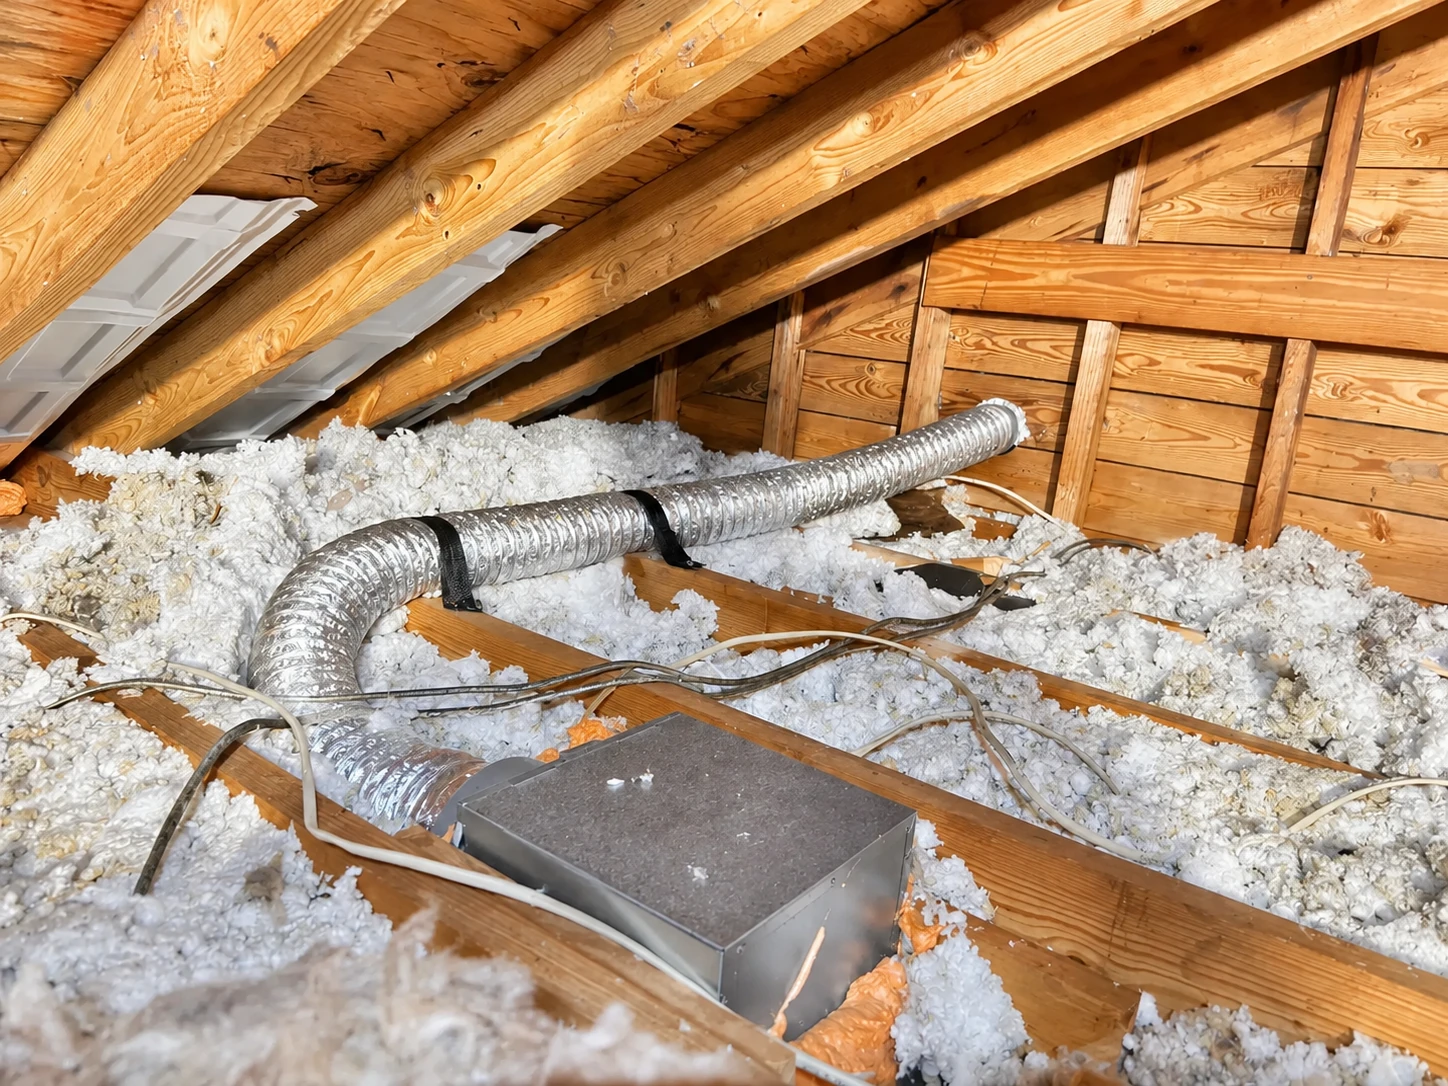
If I'm using flexible duct, I don't want it sitting in the attic swirling and zigzagging all over the place. I want a nice, straight, tight run.
On the Columbia job, I extended the duct to the gable wall in one continuous length. No unnecessary joints. No unnecessary connections. I'm trying to minimize airflow resistance and eliminate places where the duct could leak.
3. Take the Shortest Practical Path to the Outside
Sometimes that's through the roof. Sometimes a nearby gable wall makes more sense. I don't want to create a long route with bends and turns when a more direct path is available.
When I'm planning a roof termination, I locate the fan discharge from inside the attic first. I want to know where the duct wants to go before somebody starts cutting a hole in the roof. For a gable-wall termination, I work out the route first and make the penetration where the duct can reach it cleanly.
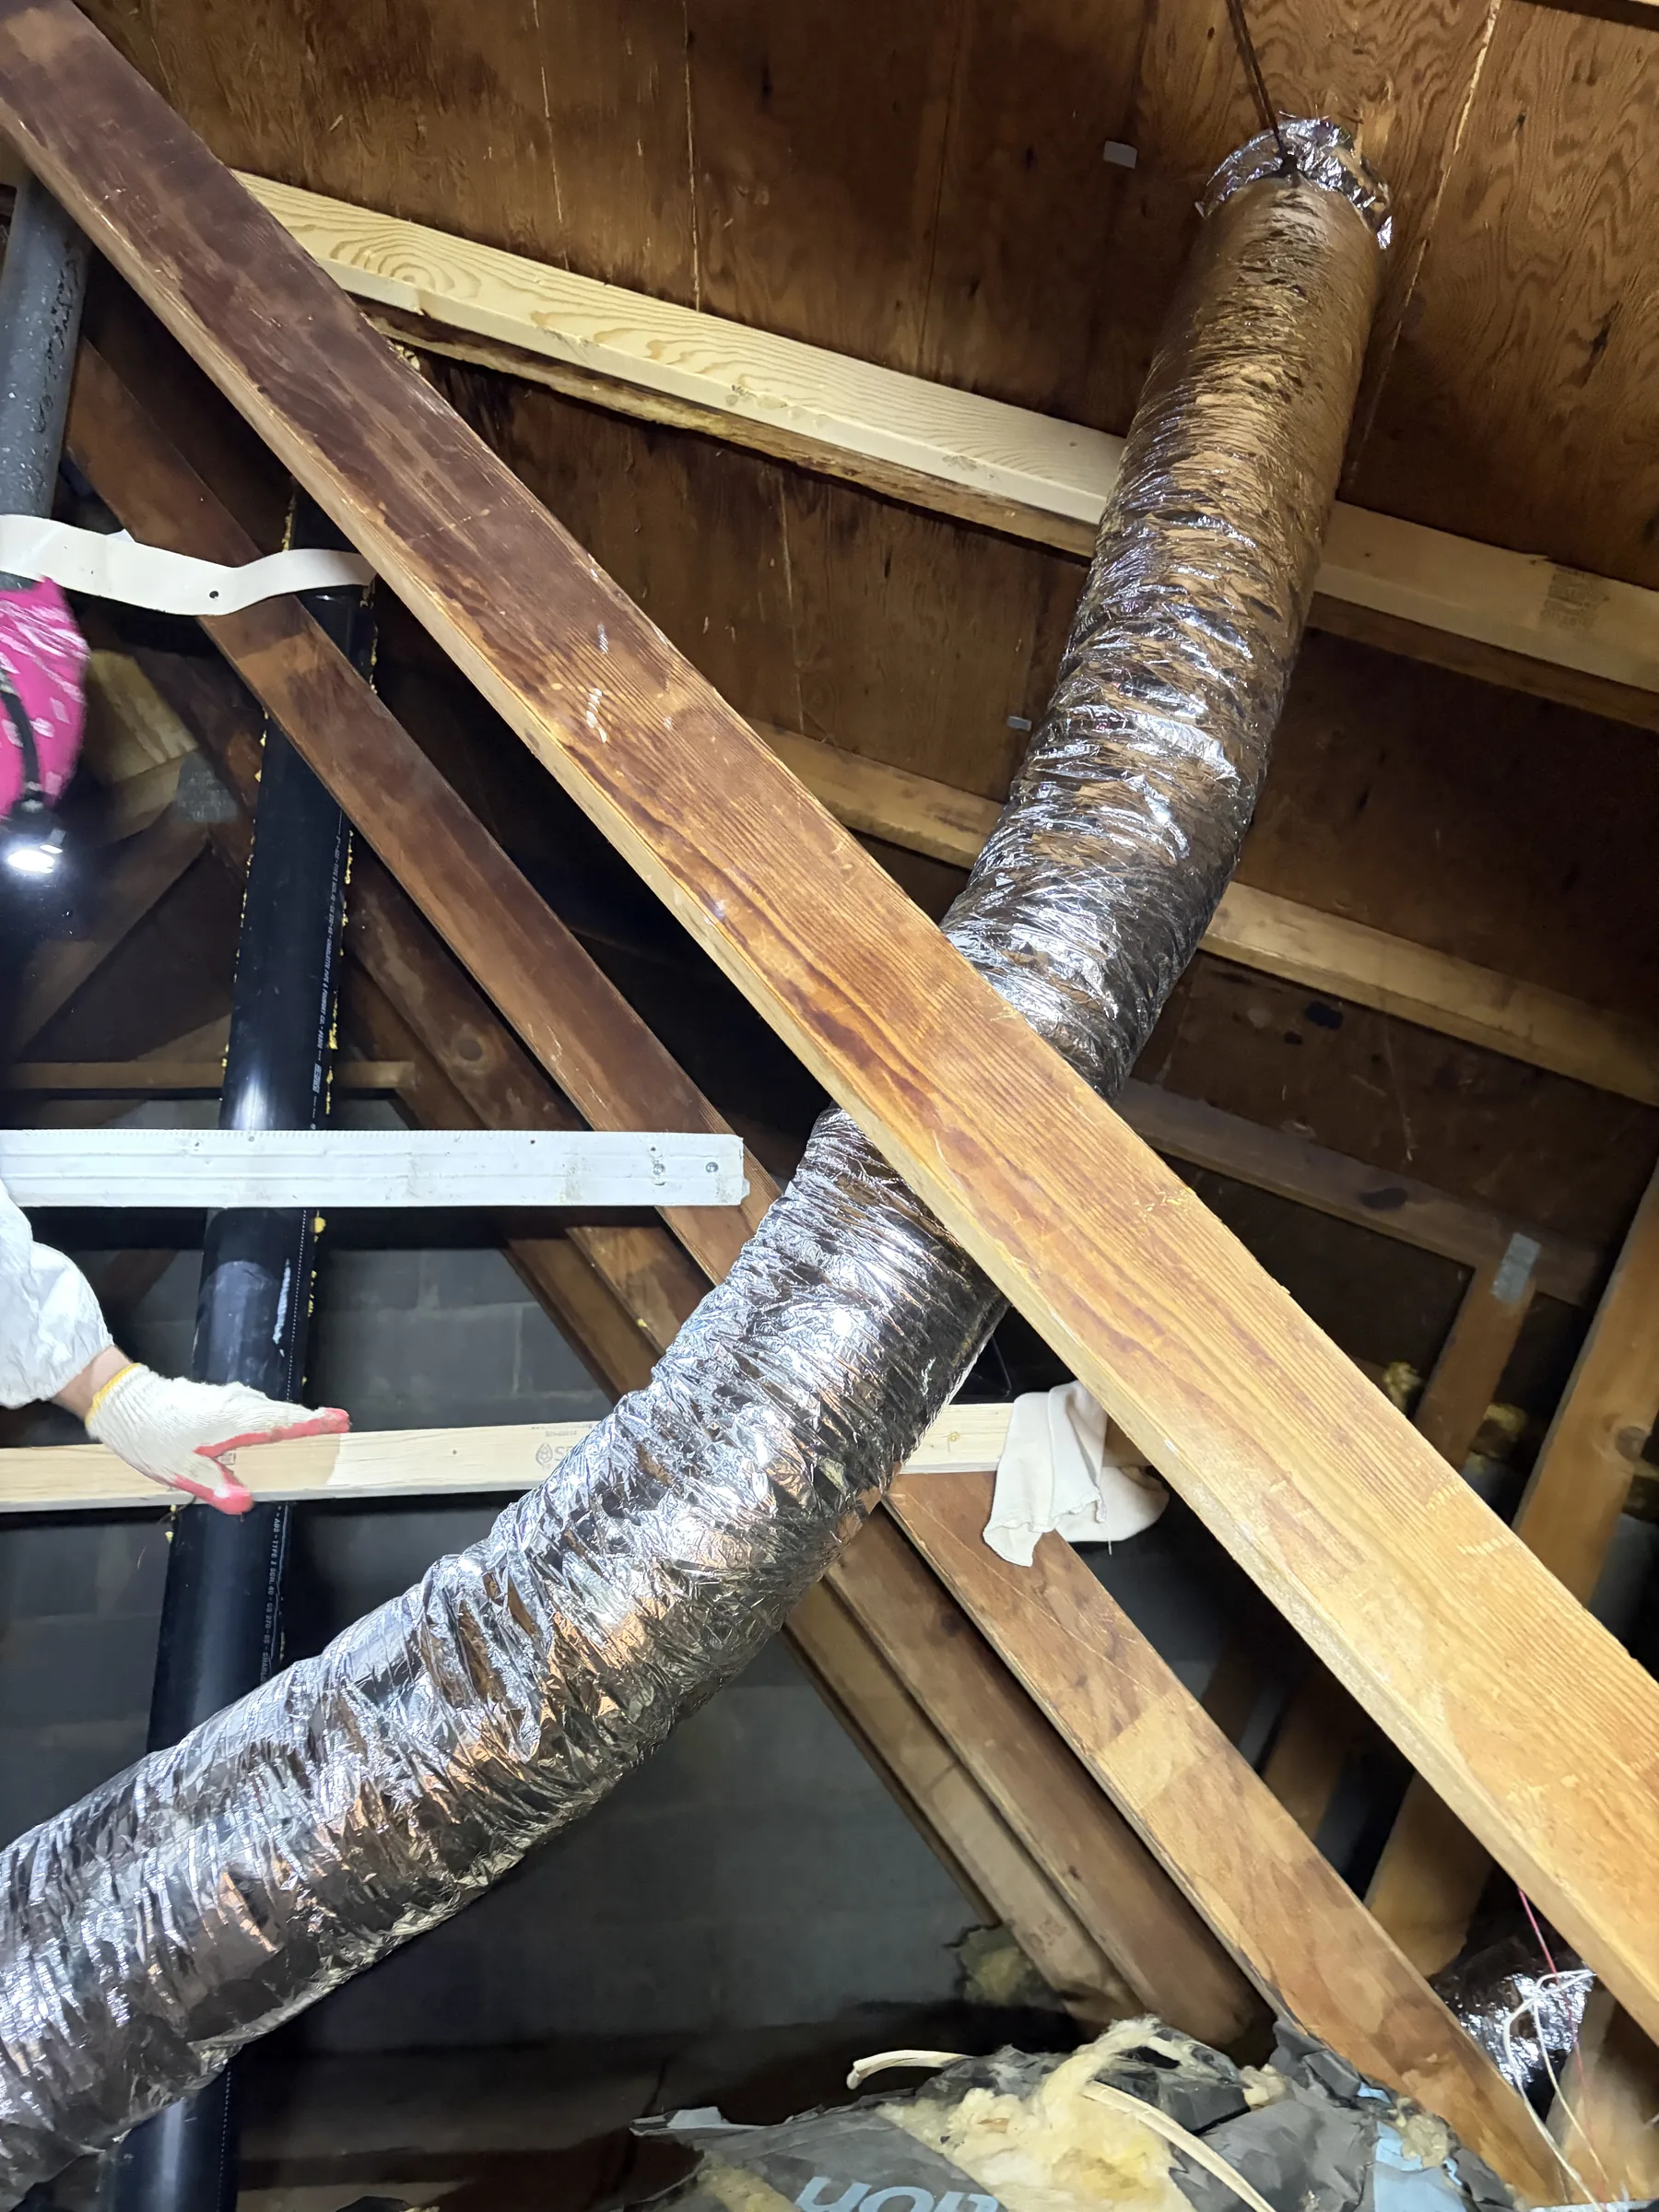
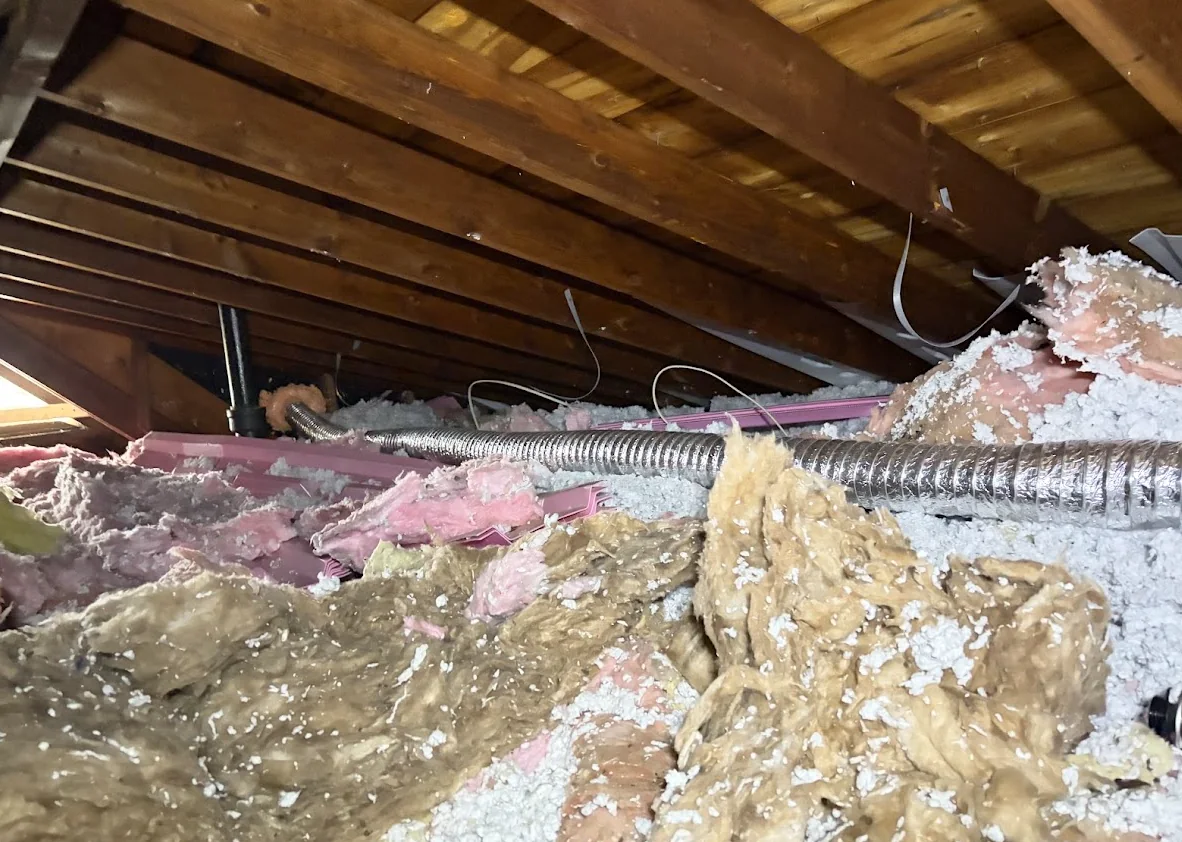
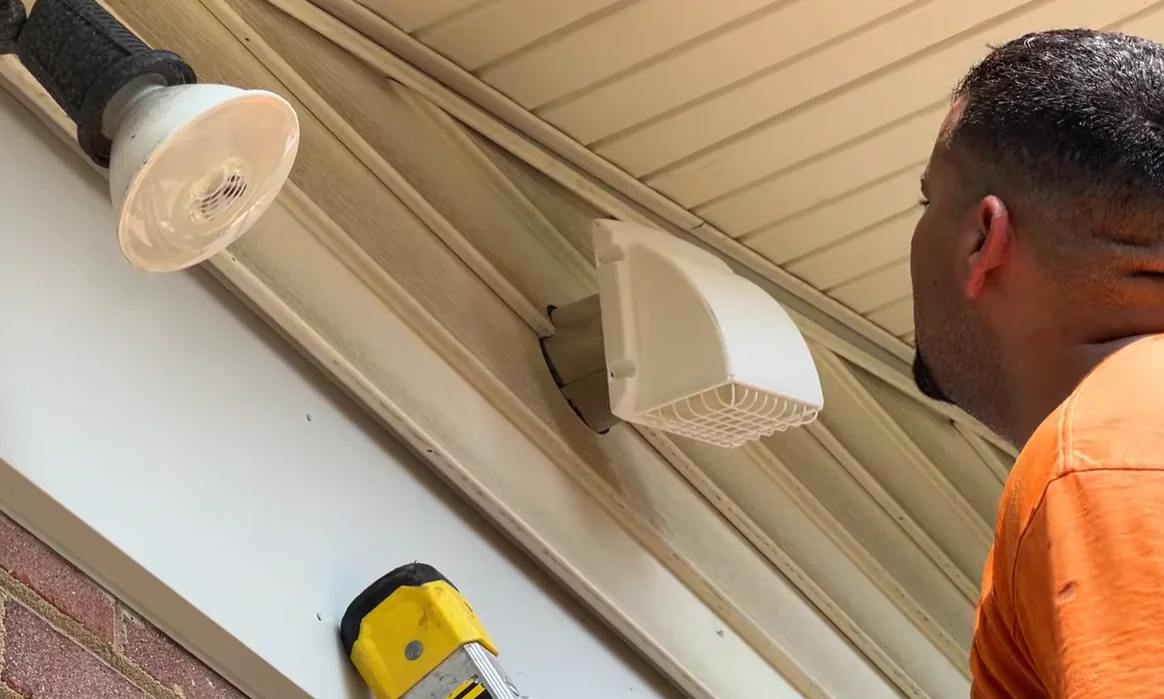
4. Pointing a Duct Toward a Vent Is Not the Same as Venting It Outside
This is something I actually find during energy audits. I've been in attics where the bathroom exhaust duct is simply aimed toward a gable vent. I've also found ducts running toward a soffit that don't make it through the exterior. That isn't how I want the system to finish.
My Real Installation
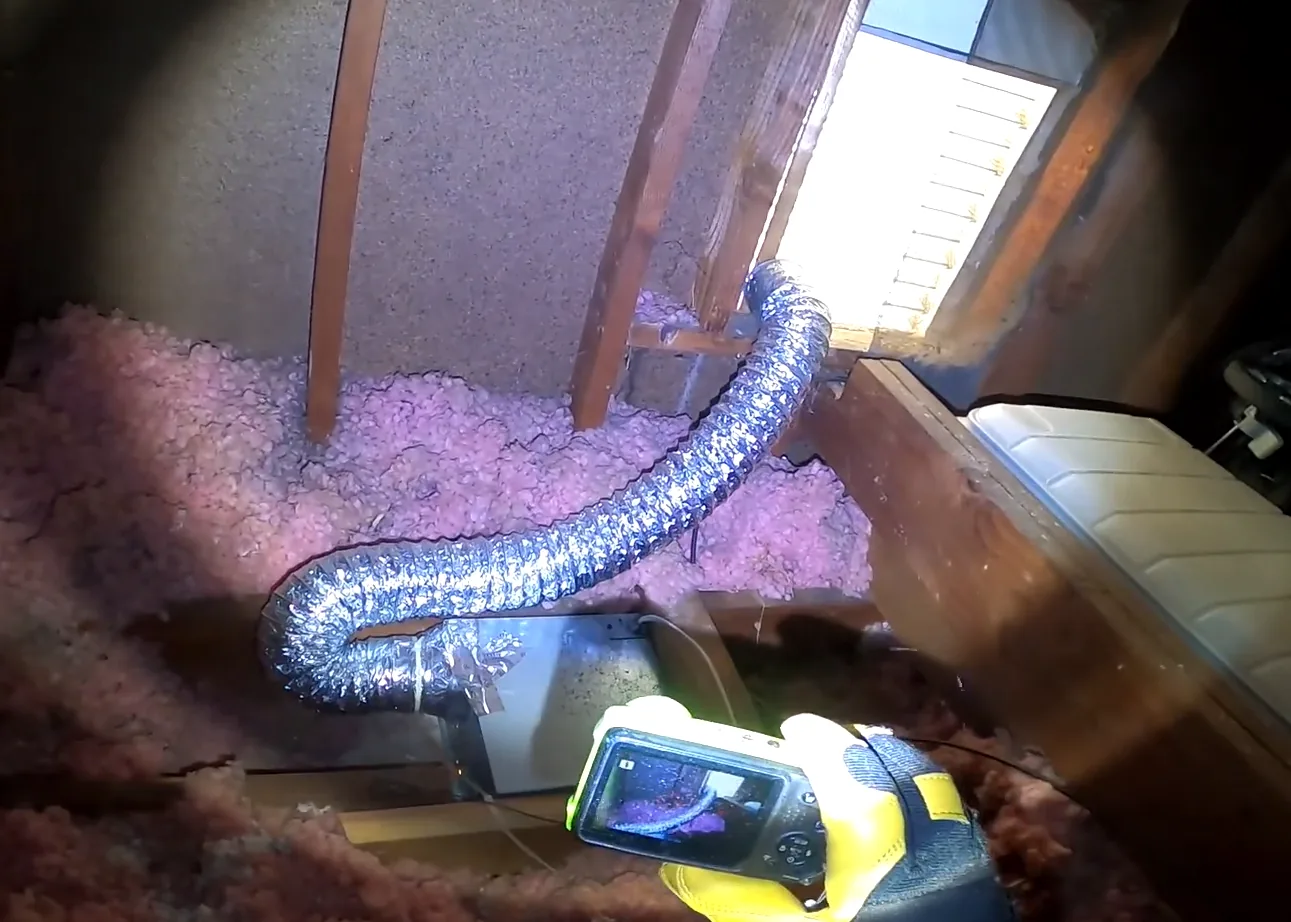
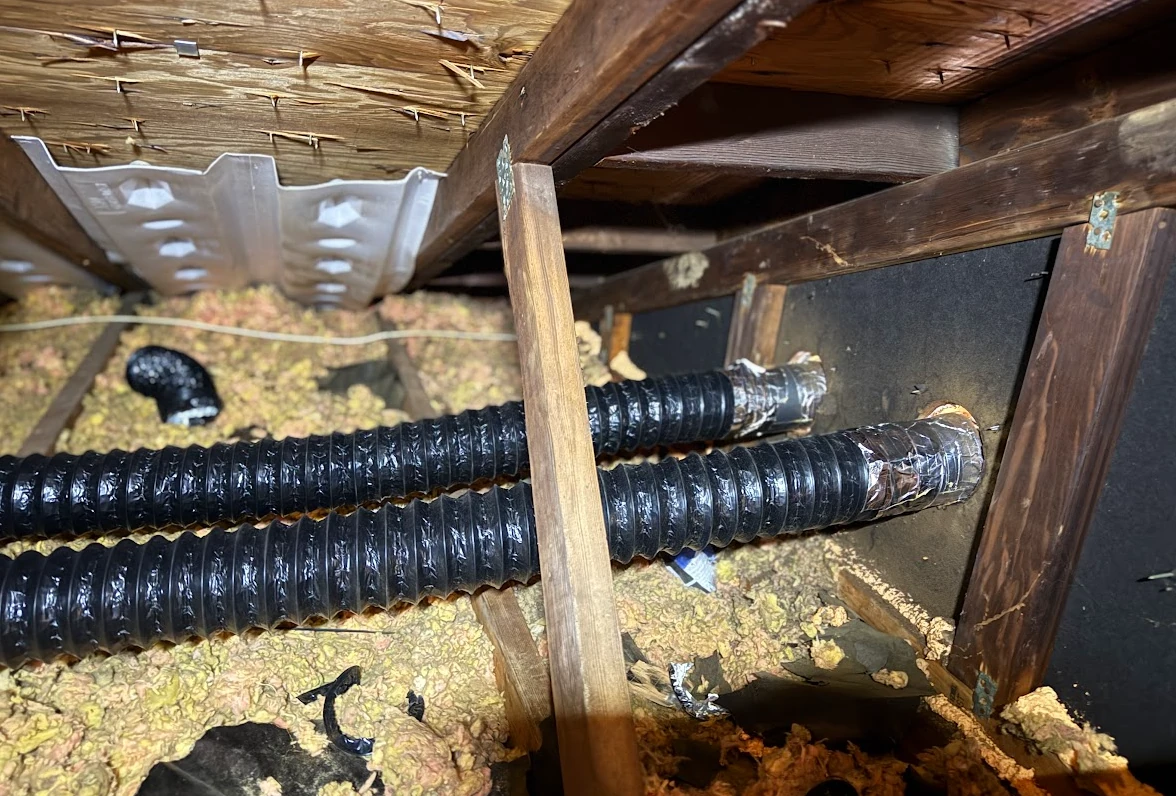
What you're looking at
The difference between aiming humid air toward an attic vent and connecting the duct through a dedicated exterior termination.
Why it matters
The termination should penetrate the wall, connect positively to the duct, and be sealed at the exterior.
I want the moisture from that shower going entirely outside — beyond the attic.
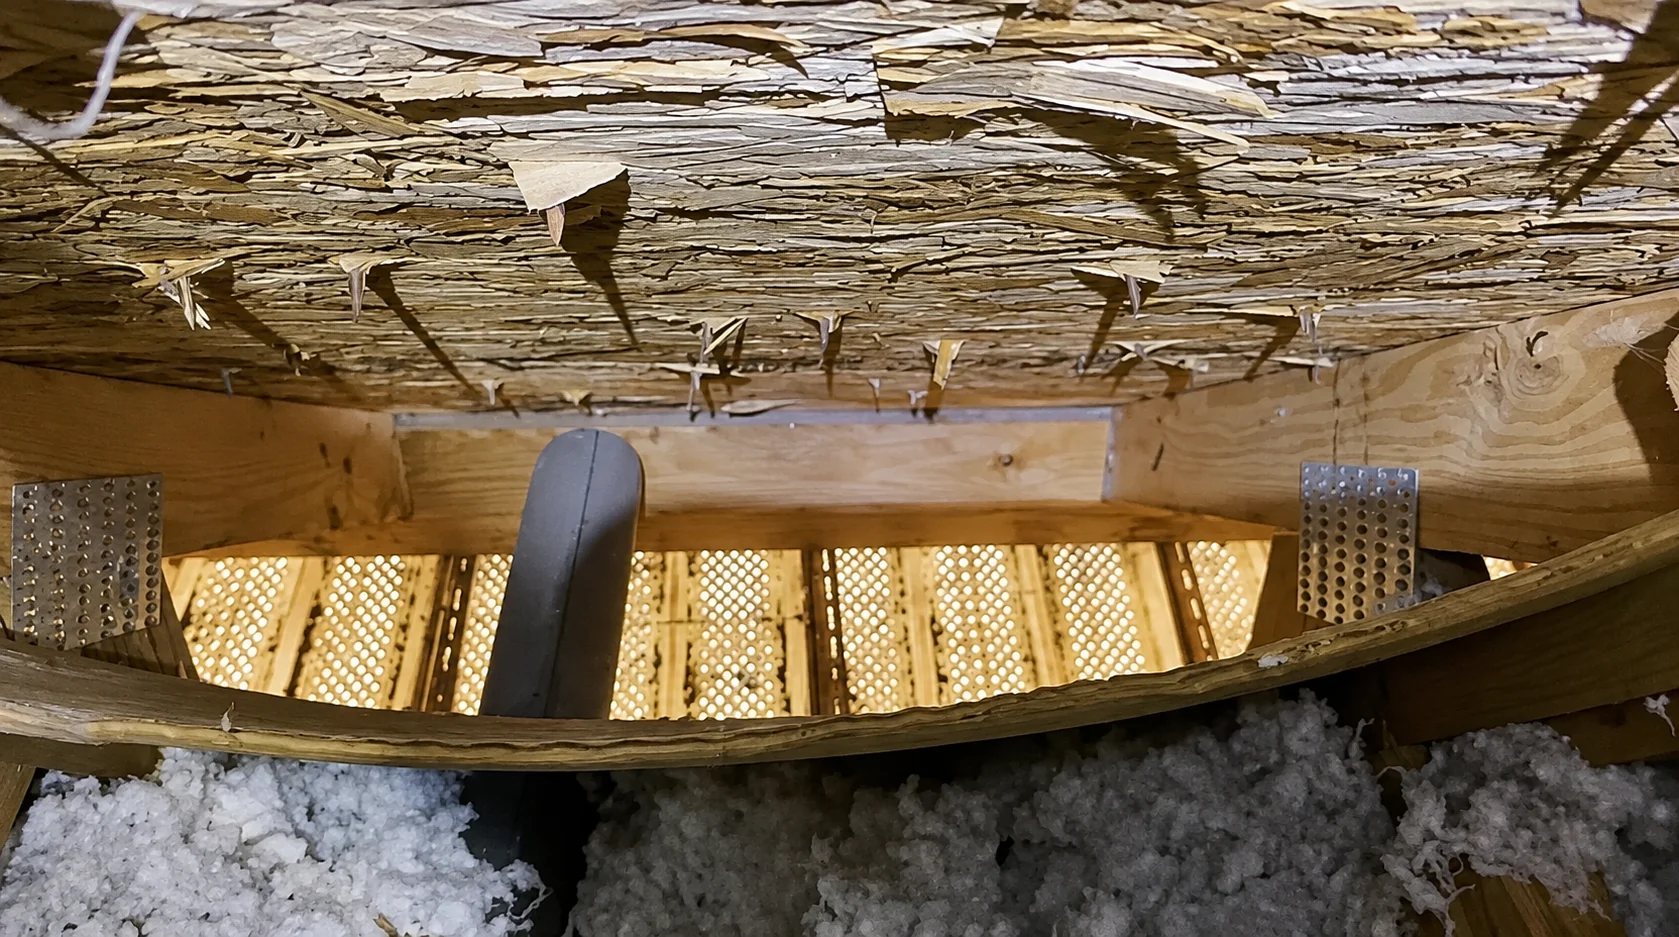
5. A Soffit Run Still Has to Get All the Way Outside
Here's another one from an attic inspection. The duct ran toward the soffit. At first glance, you might think everything was fine. But when I uncovered it, the duct stopped near the edge. It wasn't getting completely beyond the plywood to a proper exterior termination.
The fan runs. You hear it. Maybe it holds toilet paper against the grille. But you still haven't answered the most important question:
6. Seal the Connections
Once I've got the duct routed correctly, I want the connections tight. I'll secure the duct mechanically and seal the connection with aggressive foil tape. I'm not looking for something that's just hanging on there. I'm trying to create a connection that is secure and airtight.
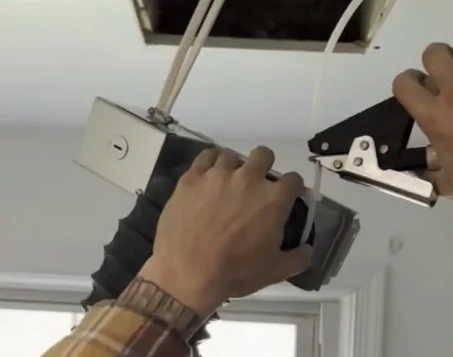
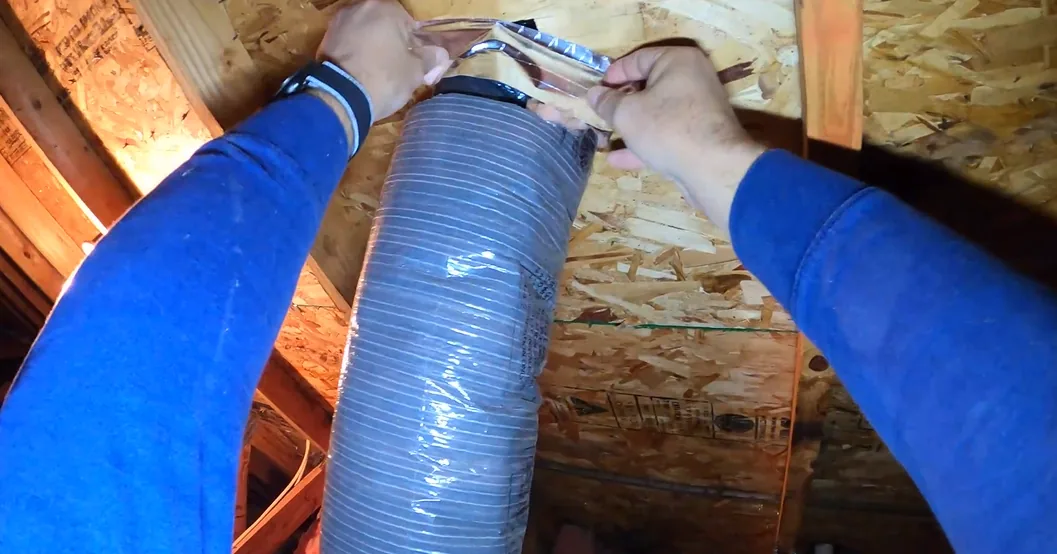
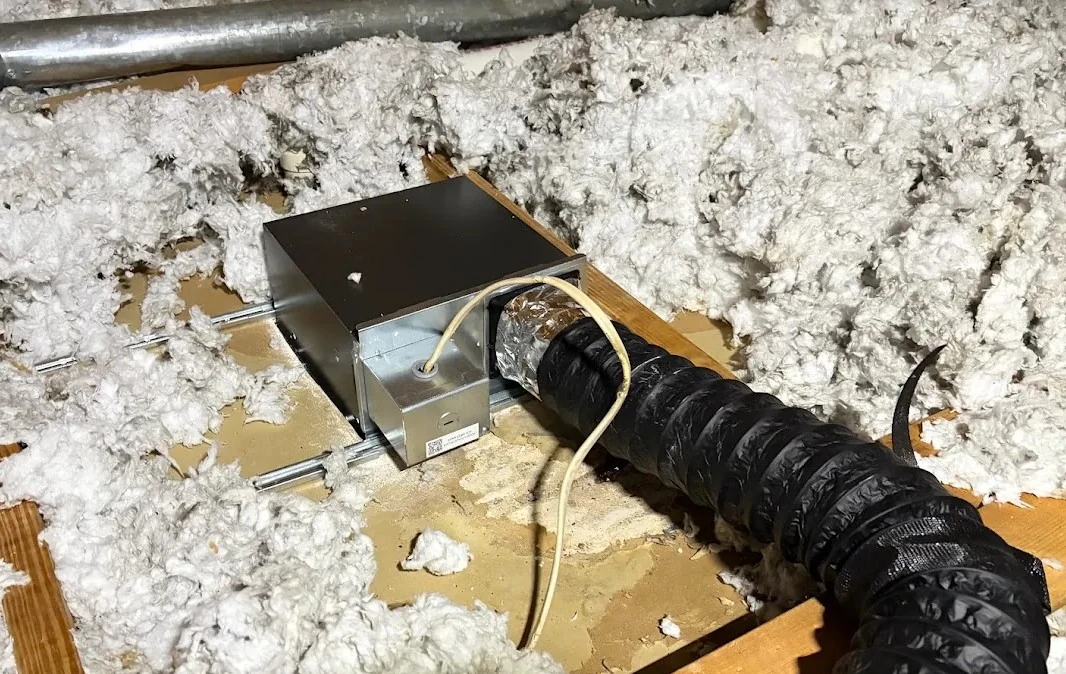
Any gaps create another opportunity for warm, humid air to escape somewhere we don't want it—including the attic. When I'm finished, I want the duct connected, sealed, and staying connected.
8. Think About Condensation When the Duct Is in the Attic
If bathroom exhaust duct is running through an attic, particularly above the insulation line, I want to think about insulation around the duct. You're taking warm, humid shower air through a duct that may be sitting in a very cold attic. That creates the possibility of condensation.
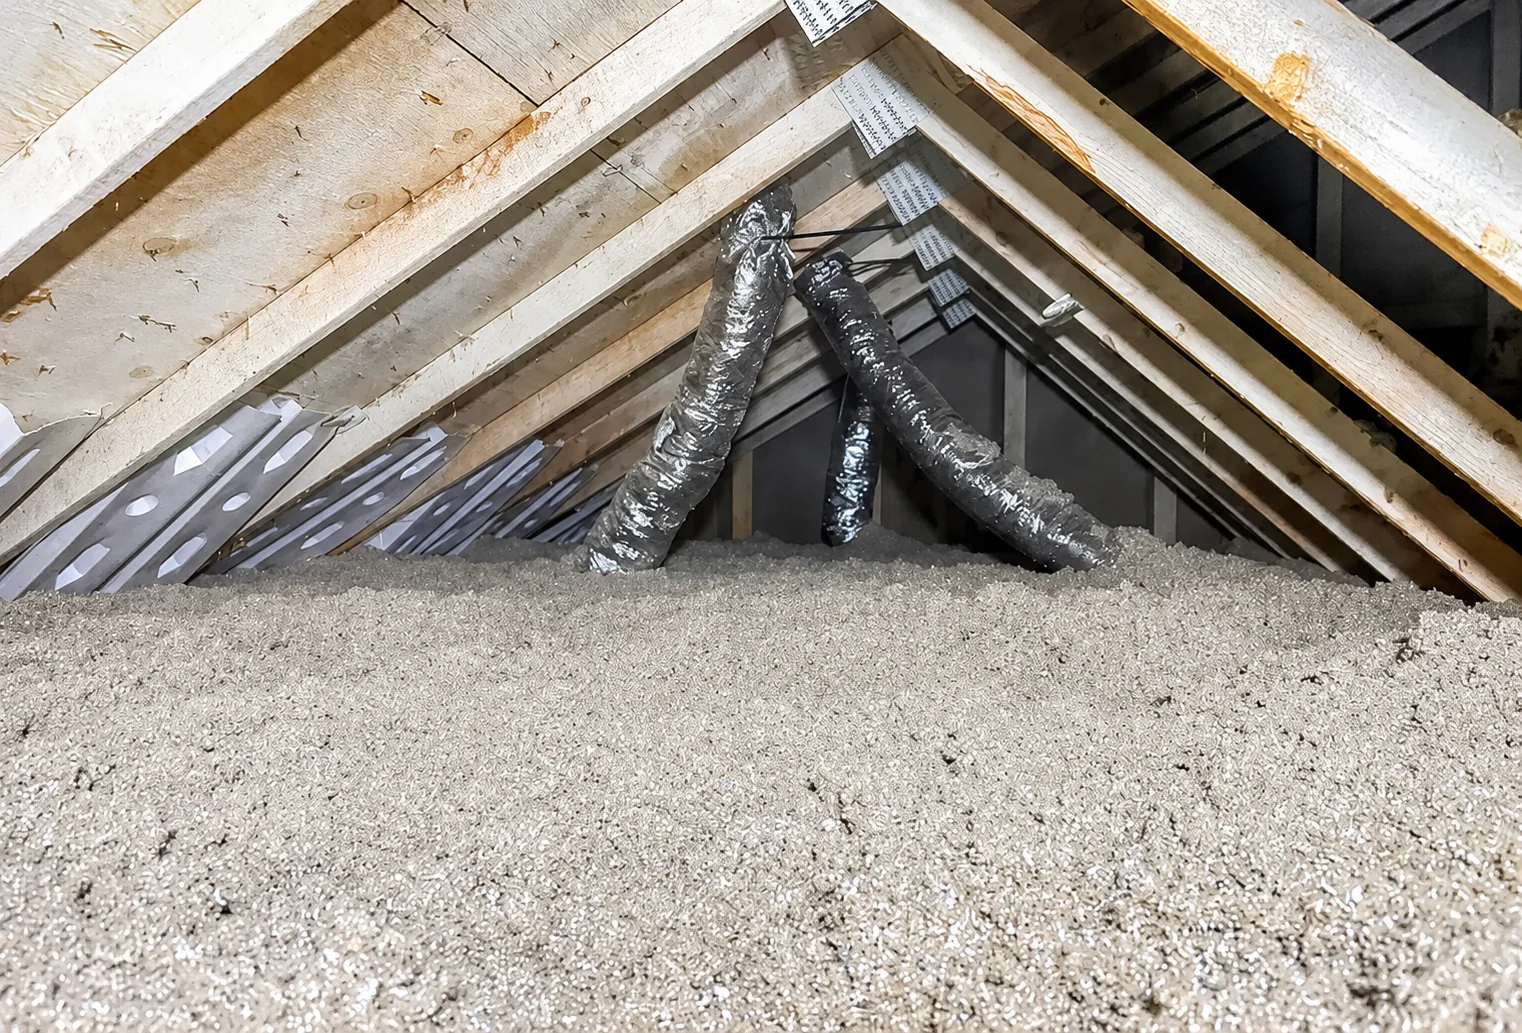
I've used pre-insulated duct and insulation wrap. If the duct is exposed above the attic insulation, I don't like leaving it uninsulated and hoping for the best.
9. The Exterior Termination Is Part of the System
The job isn't finished because the duct reaches the roof or wall. The exterior termination matters too.
For a roof termination, I'm looking for a proper roof cap and working backdraft damper. Through a gable wall, I want a proper exterior termination, a good connection through the wall, and the perimeter sealed so water isn't getting behind the siding.
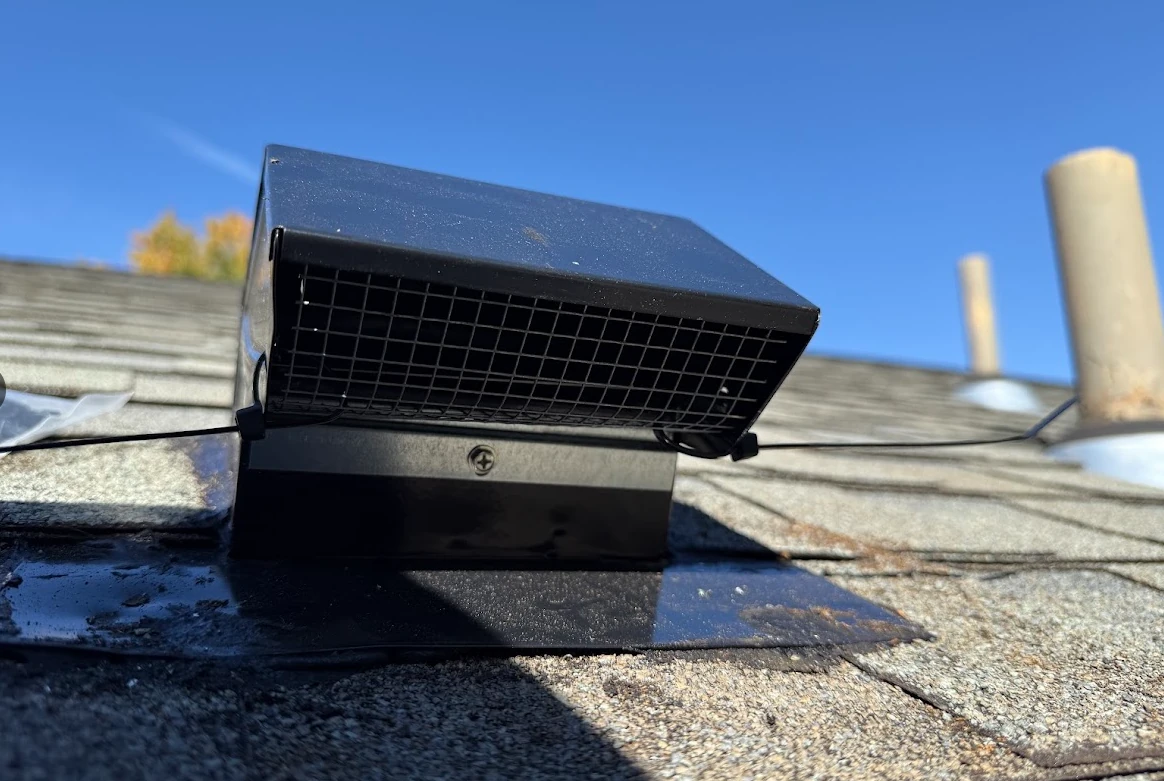
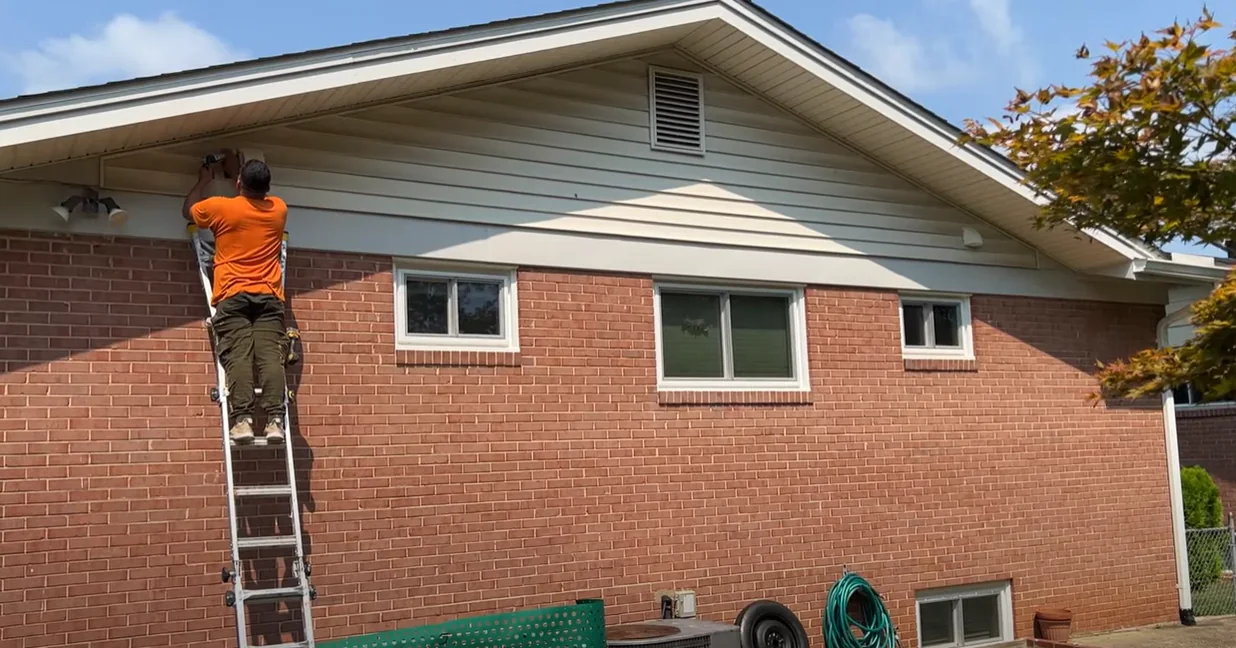
10. Test It When You're Done
This is one of the steps I think gets skipped too often. Turn the fan on and verify that the system works.
When I install a new exterior termination, I go outside and look at the damper. Does it open? Can I feel a steady flow of air? On one gable-wall installation, I watched the damper open and felt the air coming out. That's how I knew the moisture was being vented entirely outside beyond the attic.
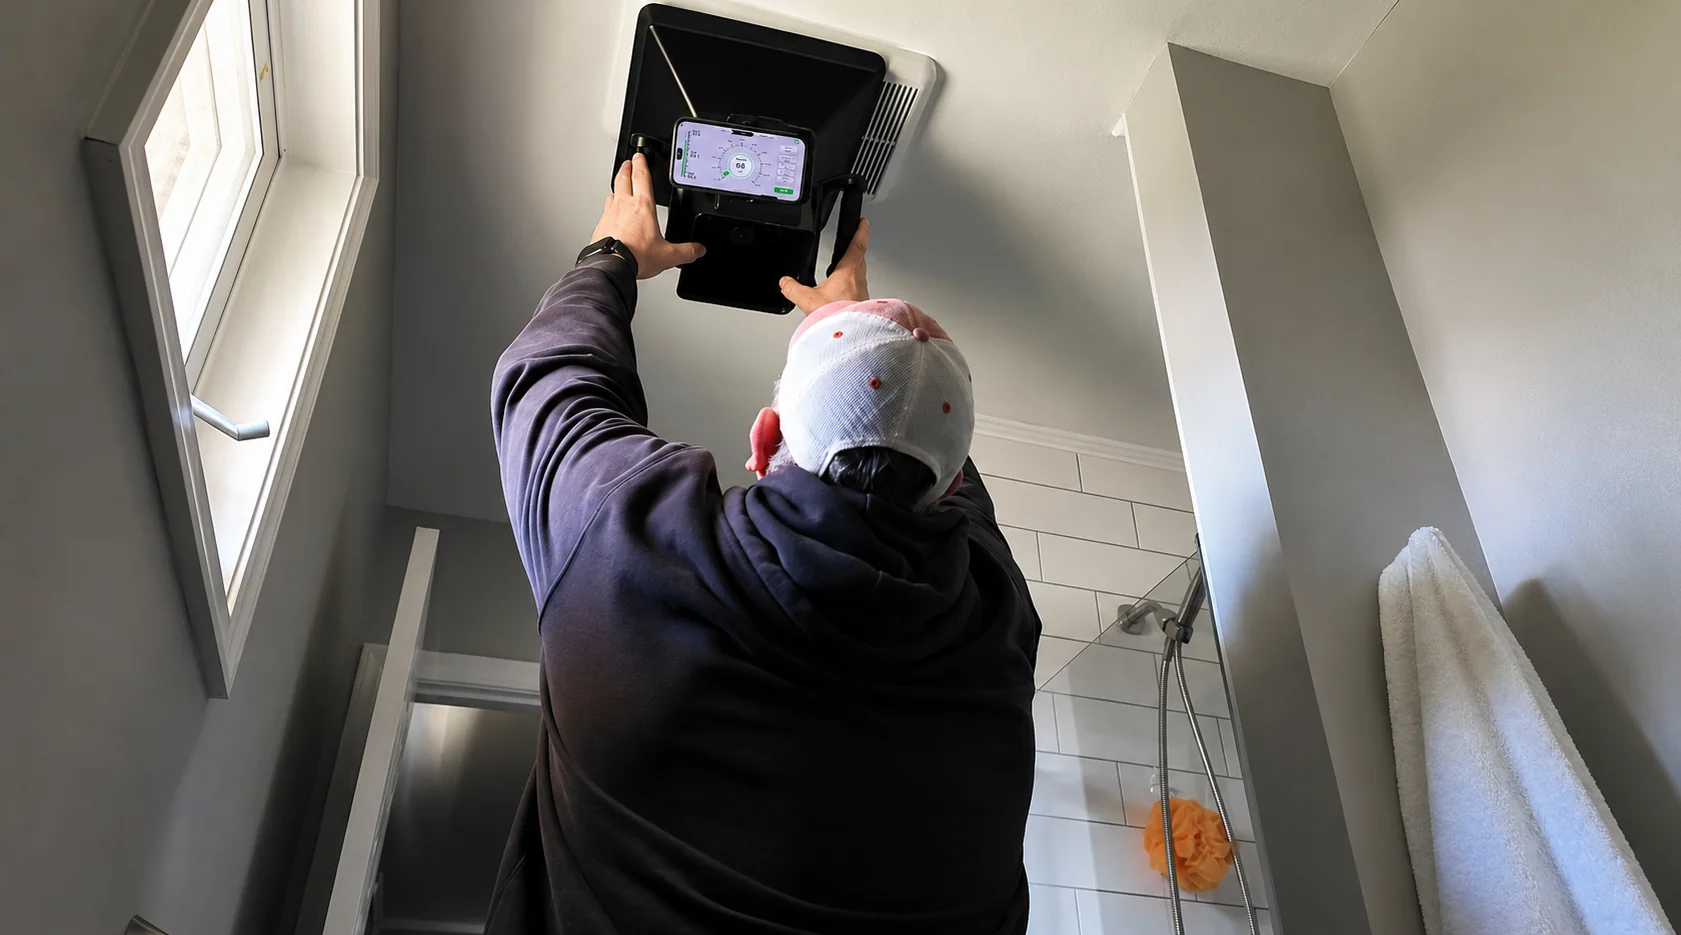
Inside, you can do a simple tissue or toilet-paper test at the grille. Listen too. An obstruction downstream can cause air to kick back and the fan to rattle. The system will often give you clues.
Replacing the Fan? Inspect the Duct First.
If your old fan doesn't work well, replacing it may be right. But don't stop at the fan. I regularly find older 3-inch duct, long flex runs, duct that isn't stretched out, unnecessary bends, questionable terminations, ducts aimed toward attic vents, ducts that don't make it outside, shared exhaust runs, and poorly sealed connections.
A new fan connected to the same bad system can leave you wondering why you spent the money.
Before assuming the fan is the problem, take a look at what it's connected to.
Fan → Connection → Duct → Route → Termination
How This Applies to the Panasonic WhisperFit
I like the fan. I like the installation system. I like the selectable airflow. But the fan still has to move air through whatever you connect to it.
Watch My Panasonic WhisperFit Review
See what I like about the fan, what could be better, and who I think it's actually a good fit for.
Watch the Review →Watch the Complete WhisperFit Installation
See the Flex-Z Fast Bracket, wiring, duct connection, and details that make the installation go smoother.
Watch the Installation →Download the free installation companion guide →
Choose the right WhisperFit and starting airflow setting →
Bathroom Exhaust Ducting: My Field Checklist
- Is the duct actually connected to the fan?
- What size duct am I working with?
- Can I transition an older 3-inch system to 4-inch near the fan?
- Is the duct stretched out instead of compressed and zigzagging?
- Am I taking the shortest practical route to the outside?
- Are there unnecessary bends or connections?
- Does the duct actually penetrate the exterior?
- Is there a dedicated exterior termination?
- Is the exterior damper working?
- Are the duct connections secure and sealed?
- Does each bathroom fan have its own exhaust path?
- Does exposed attic duct need insulation?
- Did I actually turn the fan on and verify airflow outside?
You don't have to overcomplicate this. Take the humid air from the bathroom and get it completely outside with as little getting in the way as practical.
The fan is important.
But the fan is only one part of the system.
Keep Planning the Complete System
Use the Start Here bathroom-fan replacement resource, diagnose weak airflow with the system-first troubleshooting guide, or return to the BathExhaust homepage.